"If you hear a voice within you say, 'you cannot paint,' then by all means paint, and that voice will be silenced." --Vincent van Gogh

Saturday, February 28, 2009

Whadda Ya Know?

Not much! You? (ok, that was a joke ... fans of National Public Radio might get it...) anyway - Whadda ya know, I finished a UFO (unfinished object aka old project) ... took me long enough.
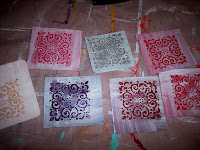
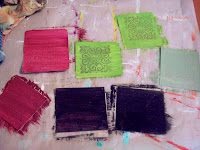
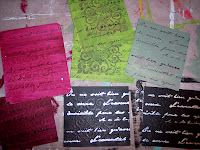
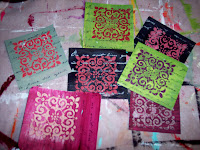
I traded 1.5" alphabet tiles with the Art Techniques group, waaaay back in late 2007. I have had these tiles in a little box thinking they were all cool and not having a clue what I would do with them. I finally made a decision and here is the result. The mat was a store-bought black mat when I started and I glued and painted and worked it to death until I finally felt it suited the piece. I think the hardest part was deciding which word to put in the center. Even with my choice, I wish the W were a bit larger. I guess I could change it, but that really isn't the point of a collaberative art piece. Click on the photo to see it close up. The tiles are all unique and pretty amazing.

Thursday, February 26, 2009

Unfortunately, this is just for fun...

I saw this on Kate's blog and thought I would do it, too. To play, do an internet search with the string: "unfortunately, your first name" and see what comes up. Here are some of the more amusing ones...

Unfortunately, Michelle was made redundant in July 2007

Unfortunately, Michelle has a habit of going much too far

Unfortunately, Michelle's prediction proved quite prophetic when disaster struck during the party

Unfortunately, Michelle is not mass murderer

Unfortunately, Michelle had now begun to associate with known-gang members

Unfortunately, Michelle is not one of them. Deal with it.

Unfortunately Michelle never got her due

Unfortunately, Michelle has to deal with stuck up Tracy (sorry, T!)

Unfortunately, Michelle thought she didn't need any help

Unfortunately, Michelle is getting a bit fussy, and starting to whimper

and on that note...

Tuesday, February 24, 2009

Thinking outside the Crayon Box

I can't remember who gave me this idea ... it was probably someone from the Art Techniques yahoo group. Anyone who has kids probably has gobs and gobs of used crayons languishing somewhere (an old lunchbox in my case). I have melted crayons onto fabric and paper before, and I have done the proverbial crayons between waxed paper art project with kids. But this is the first time I have transformed something like this:

On the left is a piece of handmade (not by me) paper in various shades of gray. On the right is the same paper, after I went at it with crayons. Below is the entire colored piece, which I have used as the back of another project I am working on.
I wrote the poem on the paper first, in permanent ink. Then I used a Clover mini iron (it is handheld with a small triangular plate) to apply the crayon. I melted the wax onto the iron, then swiped it across the paper. I continued until the background was covered, then I went back in with a pink crayon and used the triangular shape of the iron to create petals for the flowers. After I was finished, I sandwiched the paper between paper towels (I think plain paper would actually work better for this) and then put all that between parchement and used my regular iron to heat the piece. The towels absorbed the wax (most of it) and left the pigment behind.

This is a piece of fabric (plain old cheapy muslin) that I treated the same way. When I finished appying the crayons, I added a thin wash of textile paint to the back side to fill in the remaining white areas. It was more difficult to remove the wax from the fabric, but boiling it with a little detergent seemed to help. It still has a little stiffness to it, but with a little effort I'm sure I could get all the wax out. If you have ever tried batik, you know what I mean. Lots of potential in this technique!


Friday, February 20, 2009

The Shape of Lightening

Those of you who have read my blog for a while might remember the tree that was struck by lightening right in front of my house late last summer. I speculated whether the old oak would live - sadly, it did not - and it came down last week. Once it was felled it was quite clear that it took the full force of the lightening bolt and really had no chance of surviving.

That black gash in the center of the tree is the path the lightening took - it blasted its way straight through the trunk and down into the ground. The black is charred wood and the inside of the chamber is filled with ashed and cinder.
Here is the stump - you can see where it went all the way through. The tree was very close to our house - maybe 15 feet away - and clearly spared our house from being struck. I'm only sorry that it had to give its life to do so.

Here is a closeup of the hole - I think it sort of looks like a bat - it is the shape of lightening.


Monday, February 16, 2009

And the Winner Is ...

KIWICAROLE !!!!!
Congratulations!!! Send me your address and I will have a package off to New Zealand (down under Down Under?) this week. Thanks for being a great Cyber-Friend! And many thanks to everyone who left me comments. I hope those of you who were new to my blog enjoyed your visit and will stop by again. To those of you who commented that you wanted more information on a technique ... my contact is over on the left side of my blog, and I look forward to hearing from you. ~Michelle

Friday, February 13, 2009

Happy Valentine's Day (a little early)

"Kiss Me"


These are the Valentines ATCs that I made for a trade. They are my first done on a paper base in a Mixed Media/Collage style and it was a tremendous challenge for me. I had several failed attempts before coming up with a layout that I liked.
Well, now you know where the lips ended up! I made a little pocket (from a paper punch) out of an old map and hid the lips tag in there. The ATCs are entitled "Kiss Me" ... appropriately enough ... and the kiss in there for the taking. Hope you like them! And have a Happy Valentine's Day. At my insistance, we are foregoing the (rather pricey) cards and chocolate and instead will enjoy some wine and a movie at home. Nice.

Wednesday, February 11, 2009

TUTORIAL - Embossed Paint Chips and a GIVEAWAY

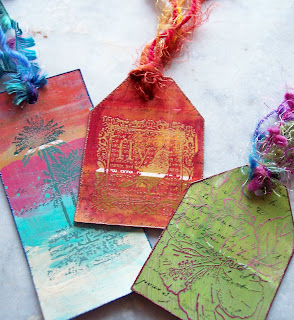
This is my 200th post, which seems quite unbelievable. I really appreciate all the support I get through your comments here and all the new friends I have made though blogging. Thank you. Here is the tutorial for the smootchy kisses (prior post), the pieces that are in my current blog header and the bookmark and tags below ... hope you will give it a try! Be sure to read to the end to find out about the giveaway! And as far as those smootchy kisses go, it's a rubber stamp (which I bought at Michaels) so whatever image you want to portray, that's where you've gotta start!
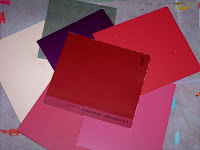
Well, if you're like me, your need for color extends beyond your art. My walls are not white!! I have a box full of old paint samples that I've picked up along the way. That one on the very top? They don't even make that brand anymore!!! Well, dig 'em out and put 'em to use in your art. If you are making tags or need a unique shape, be sure to cut the shape before you start. If you are just going to trim away excess, you can do this later in the process.

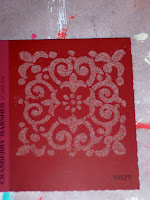
The first thing you need to do is find a rubber stamp that you like, and stamp the image with a colorless embossing ink (I use Versamark, there are other brands). Then sprinkle CLEAR embossing powder on top. It is important that it is clear ... the colors that you see showing through in the finished pieces are the original colors of the paint sample. You can even see the white lines (which I happen to like). Heat the clear embossing powder to melt it and let it cool.

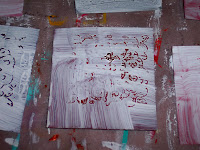
Now take Gesso and paint over the whole sample. Note: some samples are extremely glossy and the gesso does not like to stick. If this is the case for you, you can lightly sand the paint sample first, but you might lose some of the color. I just chose not to use those samples. Let the Gesso dry.

Now that the Gesso is dry, take a soft cloth (paper towel, Handiwipe, cotton cloth, etc) and **very lightly** dampen a part of it. Gently rub over the embossed section to remove the Gesso from the embossing powder. You don't want to remove the Gesso from the background, but you will probably remove a little bit. That's ok. If you feel too much has come off, just repaint with Gesso and repeat, a little more gently this time. I go back afterwards and buff with a dry part of the cloth just to get the last traces of Gesso off. Don't obssess, the imperfections of this process are what make it so cool.

Now take some acrylic paint - in a color that contrasts with the color of the paint sample - and paint over the entire piece. You can paint a solid color, or paint more than one color. Whatever you'd like. On the lips, I painted first with a flat gold paint and then went over that with a thin layer of gold metallic. Let this dry completely. Several hours is best.

Using a water proof ink (such as StaZon) or paint (I used silver paint on the black samples), stamp words or some other overall pattern onto the piece. This will give added interest. You can skip this step if you want. I did not use this step for the lips, but I think it adds a lot to the other pieces. If you used paint, let it dry. If you used ink, carry on!

Using your slightly damp cloth again, rub gently over the embossed image to remove the paint and reveal the original sample color. Again, be careful not to rub too hard or you will remove some of the paint from the background (as you can see in the reddish pink piece...) If this happens, just let it be. With a dry cloth, buff the surface to remove any last traces of paint. Again, don't get hung up on perfection.

This is how your pieces should look. Trim them down to the size you desire. I just squared these up.
Using a liquid gloss varnish, coat the piece. The gloss varnish really brings out the details. I used Liquitex brand on my pieces. Let this dry.

If I am making a bookmark or tag, I attach watercolor paper to the back of the piece to make it more sturdy and to cover up the writing and any paint on the back of the sample. If I am just going to incorporate the piece into an artwork, or use it on a handmade greeting card, I skip this step and use it as it. Regardless, the last step for me is to get out my Versamark ink and embossing powder (this time in a color that complements the piece). I "dip" the edges in the ink and then in the EP. I usually do two edges at a time, then melt the EP, let it cool, and go back in to finish the remaining edges. This gives a nice finished look to the piece.
I hope you enjoy this technique. It is my own technique developed as a result of wondering what I could do with all those paint samples that I surely don't need anymore. Please feel free to use it in your art, but please don't publish it without permission. If you make something with it - please send me a link so I can see!
Stay tuned to see how I used those smootchy lips ... and leave me a comment! You will be entered into a drawing. I am not sure what the entire prize will be, but at the very least I will send you some items made with this technique. I will surely throw in a few extras as well. Drawing will be held Monday 2/16. Thanks for visiting my blog and supporting my art through 2 years and 200 posts!!!

Sunday, February 8, 2009

Coming Soon...

Wanna learn how to make big, smootchy, permanent kisses ... well stay tuned! I think the next post is my 200th, and on top of that, February 3rd was the two year anniversary of my blog, so I thought in honor of both milestones I would post a tutorial and have a giveaway. I came up with a new technique and I will share it with you this week, so check back often!!!

Friday, February 6, 2009

ATC Treasures

I thought you would enjoy seeing the ATCs that I received in the Surface Design swap... Top left is mine. The theme was "Show a Technique".
Top Center: Aynsley McKay - made from melted plastic shopping bags (yeah, seriously cool)
Top Right: Debbi Baker of Australia, made from painted, crinkled tissue paper (it's gorgeous)
Center Left: Marga Korioth's paint on canvas, which came in a beautiful handmade sleeve
Center: Tracy Borders fused cheesecloth to fabric, wove it with plain fabric, and painted it ... the results are stunning
Center Right: Jan Ziebol's silk fusion and felted wool. The teture of her quilting is amazing.
Bottom Left: Mags from Wales (who has a lovely view out her window) made this piece with painted paper towels ... it really is incredible what you can make from such lowly items
Bottom Right: Judy Alexander made amazing painted and stitched landscapes by painting a large piece of fabric, then cutting it up and "finding" the landscape.
They are all just amazing. And now you see why I trade...

Tuesday, February 3, 2009

Check out my NEW HOUSE!!

Isn't it wonderful? Don't you just want to be there? It was made by Pam Jones of the UK. I don't know if Pam has a blog ... if I find that she does, I will add a link. It is for the same trade on Textile Challenges that I made the "House of the Rising Sun" for. This is the first of 6 that I will receive. My theme is "tropical beach cabana". Yum. Pam stitched individual strands of raffia for the house, and more raffia for the thatch roof. The vine has little bead-flowers on it. Click on the picture to see the details. It is so perfect, I just love it.